Related Posts

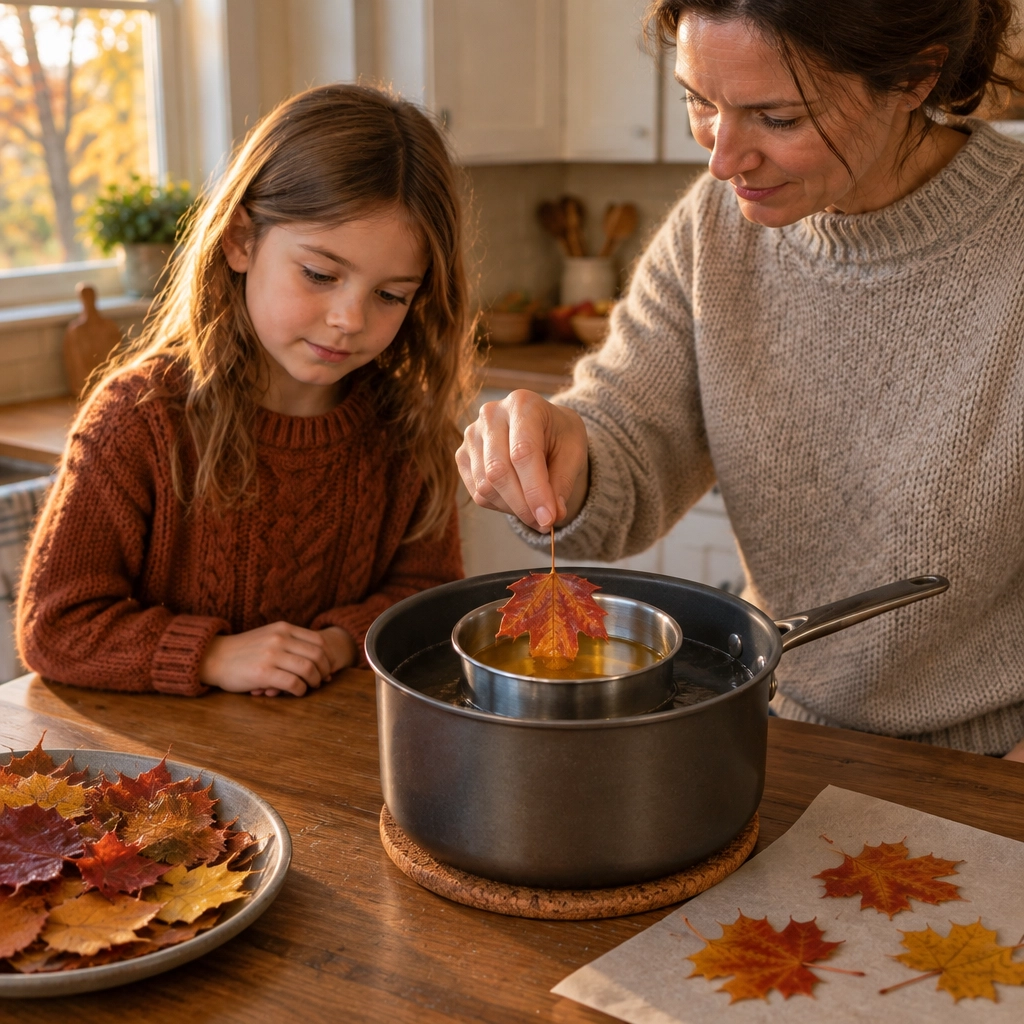
One leaf at a time, with the wax kept safely in a water bath.
Three simple projects from the Waldorf school tradition to make together as the days grow short
SNAPSHOT
Late autumn is a lovely time to make things by hand. These three projects use beeswax, autumn leaves, and colored paper to bring warmth and light into the house. Each one takes an afternoon, gives a four-year-old a real job and an eleven-year-old a real challenge, and leaves the family with something beautiful to keep or give away.
A Garland of Beeswax Leaves
Ages 4 and up. About 45 minutes, plus a leaf walk. An adult handles the hot wax.
A thin coat of beeswax keeps autumn leaves bright and supple for weeks and gives them a soft shine. Strung together, they make a garland for a window, a mantel, or the Thanksgiving table. The kitchen will smell of honey while you work.
WHAT YOU WILL NEED
- Freshly fallen leaves that are flat, dry, and still flexible
- About half a pound of beeswax, in pellets or a block
- An old pot or a clean tin can, set inside a larger pot of simmering water
- Parchment or waxed paper
- Thin twine, or a needle and strong thread
HOW TO MAKE IT
- Go on a leaf walk together. Look for leaves in many colors and sizes, with their stems still on.
- Press the leaves between the pages of a heavy book overnight so they lie flat.
- Melt the beeswax slowly in the small pot set in simmering water. Never put the wax directly over the burner.
- Hold a leaf by its stem and dip it into the wax. Lift it out and let it drip over the pot for a few seconds.
- Lay the leaf on the parchment. It will cool and harden in about a minute.
- Tie the stems to the twine a few inches apart, or sew through the stems with needle and thread.
WHO DOES WHAT
Younger children gather and sort the leaves, choose the order, and lay the cooled leaves along the twine.
Children of about 7 and older can dip with an adult standing beside them, and can tie or sew the garland.
Take care: melted wax is hot and can catch fire if it overheats. Keep the heat low, stay at the stove, and use a pot you are happy to keep just for wax.

Waxed leaves bring autumn color to the family table.
Rolled Beeswax Candles
Ages 4 and up. About 30 minutes. No heat needed.
Honeycomb beeswax sheets are soft enough to roll by hand, so even a four-year-old can make a real candle from start to finish. A pair of them, tied with a ribbon, is a gift a child can truly say they made alone.
WHAT YOU WILL NEED
- Honeycomb beeswax sheets, in natural gold or in colors
- Cotton candle wick
- Scissors
- A clean, smooth table in a warm room
HOW TO MAKE IT
- Cut a sheet in half across its short side to make two shorter candles, or leave it whole for a tall one.
- If the wax feels stiff, warm it for a minute between your hands or in a sunny spot. Cold sheets crack.
- Cut a piece of wick about an inch longer than the edge you will roll from.
- Lay the wick along that edge and fold the wax snugly over it. This first tight turn matters most.
- Roll slowly and evenly, keeping the bottom edge straight so the candle will stand.
- Press the last edge gently into the candle to seal it, and trim the wick to a quarter inch.
WHO DOES WHAT
Younger children roll short, fat candles. An adult can start the first turn around the wick.
Older children can cut a sheet corner to corner and roll from the wide end to make a tapered spiral, or press on small shapes cut from another color.
Take care: making the candle needs no heat, but burning it does. Stand it in a steady holder and light it only with an adult at the table.

Rolling beeswax around a wick takes a steady, gentle touch.
Window Stars
Ages 6 and up. About 45 minutes. Best in a window that catches the sun.
Window stars are folded from thin, translucent paper. Where the layers overlap, the color deepens, and a pattern appears that you could not see while folding. Taped to a sunny window, a star glows like stained glass. Children are always surprised the first time they hold one up to the light.
WHAT YOU WILL NEED
- Kite paper, sometimes sold as transparency paper, in squares of about 4 inches
- A glue stick
- Clear tape for hanging
HOW TO MAKE IT
- Count out eight squares. One color is lovely, and two colors that alternate are lovelier still.
- Fold a square in half from corner to corner, then open it again. You now have a crease down the middle.
- Turn the square so the crease runs straight up and down. Fold the two upper edges in to meet the crease, making a kite shape with a long point at the top.
- Put a tiny dab of glue under each flap to hold it down. Fold all eight squares the same way.
- Lay one point on the table with its wide corner toward you. Glue the next point on top so their wide corners meet and its edge lies along the first one’s center crease.
- Keep going around the circle. Tuck the last point under the first to finish the star.
- Hold it up to the window to see the pattern, then tape it to the glass.
FOLDING NOTE
- Crease corner to corner
- Fold two sides in to the crease
- Overlap the points and glue
Eight folded points make one star.
WHO DOES WHAT
Children under 6 can choose the colors, crease the first fold, and hand you each point as you glue.
Children of 6 to 8 can fold the points with a little help lining up the edges.
Older children can make the whole star alone, then try smaller squares, sixteen points, or folds of their own invention.
A tip: careful, sharp creases make all the difference. Run a fingernail along every fold.

Folded paper stars catch the late-autumn light.
Why Handwork Matters
Projects like these ask children to slow down, use their hands with care, and finish what they start. The materials are real and beautiful, and the results are things the whole family will use and enjoy. A candle a child rolled can be lit at dinner. A garland they dipped can hang over the table when the guests arrive.
Children in Montessori classrooms will find this kind of work familiar. It calls for the same concentration, the same respect for materials, and the same pride in doing something well.
You don’t need special talent to do any of this. You need an afternoon, a few simple materials, and a child who is glad to have you beside them.
Made by Hand is a regular feature of Montessori Family Life. These projects are inspired by handwork traditions long practiced in Waldorf schools.