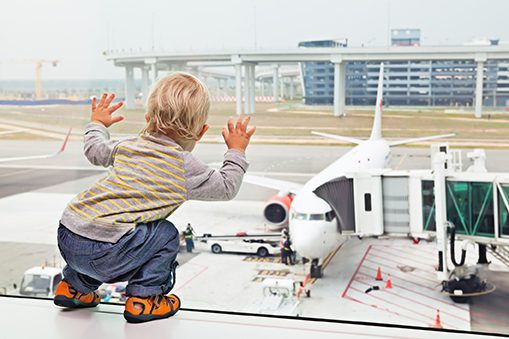
Traveling with Young Children
Yay! It’s time to visit friends and relatives for the holidays!
The thing is, though, that you’ve got young children, and a plane flight looms on the horizon. The only thing worse than sitting in front of a fussy child on a plane is the parent who is trying so hard not to have THAT child! No matter how well behaved your child might be in other situations, all bets are off when it comes to air travel.
While we all dread having THAT child, it’s worth remembering that most of your fellow passengers have probably had the same experience at some time in their life with their own children. Young children are excited and cranky and too tired to sleep. While there’s no sure-fire fix to eliminate the stress of plane travel with young children, there are some ways to make it easier.
Before we talk about fun, let’s remember some basic ‘housekeeping’ issues.
Bathroom/Diapers: Use the restroom facilities in the airport before boarding the plane. Even when your newly diaper-free child says a bathroom break is not necessary, now is the time to learn one of the basic life lessons: Never turn down a free lunch or a chance to go to the bathroom! If you have ever tried to change a messy diaper in an airplane bathroom or had to stand in line with a crying toddler grabbing his pants as you wait for someone to exit the lavatory, you know the importance of this step.
Wipes: Bring wipes of all kinds: diaper wipes, face wipes, hand wipes, disinfectant wipes (for the plane tray and basically everything your child is going to touch… or has touched), and glass wipes if you wear glasses, because they will probably get smeared with something.
Popping Ears: All children (and adults) feel pressure in their ears as the plane gains altitude. For children, it is more painful. If you’re traveling with a baby, now is the time for breast, bottle, or ‘binkie.’ Many adults chew gum for the same reason. For toddlers, this might be the time to treat them to a lollipop (sugar free preferably). Swallowing is the key!
Now that you’ve attained lift-off, here are some other suggestions that won’t break the bank or waste valuable carry-on space, plus you will find them useful for occupying children in restaurants while on vacation and when you return home.
PAPER & CRAYONS
Cut some small pieces of colorful paper and allow the children to make their own little book. Crayons are better than markers. You don’t need all 500 colors; a small pack of basics will do! Let children create a story about their trip or anything else that interests them. If they want to dictate a story to go along with pictures, be a scribe. If you are really organized, make all the pages of equal size, punch two holes along the sides of the paper and bring a strand of yarn to bind the ‘book’ when it is finished. Let your child ‘read’ the book to grandparents or friends upon arrival.
PLAY DOUGH™
Maybe you have never allowed your children to play with this stuff at home. If so, this will be an absolute revelation! (Silly Putty™ is another choice). There are plenty of great recipes online if you want to make your own, or just buy some small containers of Play Doh™. Small containers are really inexpensive (about $1 each). Allow your child to remove the dough, smell it, feel the texture, and dig in. You can show your child how to make snakes and bowls and all the dough art you made when you were a child. Just don’t let them eat it. It does smell delicious! When you are done, be sure to wipe down the tray for the next passenger.
BLOCKS
A small Lego™ set can occupy a young builder for … minutes? It’s also a good opportunity to teach or engage children in identifying the block colors. Tegu™ blocks are another fun possibility. Tegu’s Pocket Pouch includes 8 magnetic wooden blocks and is packaged in a felt pouch. Tegu has reinvented the wooden block, and, by safely embedding magnets into each piece, these blocks are “curiously
attractive” for both kids and adults. The pouch sells for about $25.
ETCH A SKETCH™
This old favorite is making a comeback in a small, portable model. The Pocket Etch a Sketch™ should not cost more than $10 and is pretty entertaining for busy hands.
STOCKING STUFFERS/ GRAB BAG
Little presents that can be doled out on an hourly basis give bored children something to look forward to and represent passage of time if done on an hourly basis. Wrap each ‘present’ to prolong the experience. Little inexpensive items are all you need.
STICKY NOTES
Buy a multi-colored pack of Post-It Notes™ and let your child decorate his tray, seat, window. Be sure to retrieve them upon landing so that they can be used later.
SNACKS
Be sure to bring an assortment of snacks. The Cheerio Play Book allows your child to combine snacking with reading. On every page, there are pictures that need to be completed by adding Cheerios™ to just the right places. Pages are recessed to help children successfully place their own dry cereal pieces within the scenes. The book costs about $8. Remember to bring a sandwich bag full of Cheerios™!
In addition to your child’s favorites, we’ve got some snack suggestions in the box on the next page.
PEZ™ DISPENSER
Yes, it is candy, but it is very small and might be something your children haven’t experienced. This product has been around since the 1920s and now apparently comes in many theme-oriented dispensers. Popping the top is actually more fun than eating the treat. Just watch your children to make sure they eat the candies properly. If you can’t find these items in your local stores, just go online!
TABLETS [Editor’s Note: This is not an endorsement of tablets, computer, or phones; however, when used sparingly at home, this is a great way to make a travel experience a whole lot easier!]
When all else fails, loading books and movies onto an iPad may be your best bet. Remember to bring kid-friendly earphones. The whole plane doesn’t necessarily want to hear the soundtrack from Frozen over and over and over. Kidz Gear™ has headphones in a variety of fun colors. The cost is about $20 and well worth it! Many wonderful children’s books are also available on Kindle™.
Healthy Travel Snacks
HIGH-FIBER/LOW-SUGAR GRANOLA BARS
Low-sugar, high-fiber granola bars are a great way to boost your kids’ nutrient intake. Plus, they’re a lot easier to eat than regular granola.
Yogurt with Toppings Crumble™ granola bars into a yogurt cup for a smooth and crunchy snack. Travel with pre-packaged, store-bought bars and yogurt cups to combine together while on the go or pack already-crumbled granola in a resealable plastic bag and portion yogurt in a travel-size container.
Granola trail mix makes a sweet and salty trail mix by breaking apart one or two granola bars into a bowl and combining with 1 tablespoon of raisins and 1/3 cup of small pretzels. Toss together and store in a re-sealable plastic bag.
HIGH-FIBER/LOW-SUGAR CEREAL
Think outside the box by taking a favorite breakfast food to the next level.
O-Cereal Necklaces String any “O”-shaped cereal onto a piece of yarn, 12 to 18 inches, depending on the size of your child’s head; tie the ends to make a necklace. This is a fun activity to do ahead of time, and kids will have a blast munching rings from their neck.
Sweet and Salty Trail Mixes Combine ½ cup of cereal with ¼ cup of yogurt-covered raisins and ¼ cup chopped walnuts. Mix well and store in an airtight container or a resealable plastic bag.
Cereal Truffles Mix together ½ cup almond butter (or any nut butter), ½ cup honey, ½ teaspoon cinnamon, 2 cups brown rice cereal (or Rice Krispies™), and ½ cup unsweetened coconut. Shape into 1-inch balls and roll in ¾ cup chopped sunflower seeds. Place the truffles on a baking sheet lined with wax paper and freeze until firm. Pop truffles into an airtight container and allow them to thaw while traveling.
ALMOND BUTTER (OR ANY NUT BUTTER)*
Nut butters are a super way to add protein to snack time, and you can make portability a breeze by purchasing the single-serving packages.
Ants on a Log Cut small sticks of celery (the log) and fill the indentations with almond butter. Place some raisins or dried cranberries (the ants) on top of the butter in a straight line. Store in an airtight container.
Kids always get a kick out of this classic snack and it’s a perfect fruit, veggie, and protein combo.
Almond Butter, Honey, and Banana Sandwich Spread some almond butter on two slices of whole-grain bread. Top with a few slices of banana and drizzle on honey. Cut the sandwiches in half, and store in a re-sealable plastic bag.
*Do not serve to children with nut allergies!
MINI PANCAKES OR WAFFLES
Frozen versions are the perfect size for little hands; they also make the best toasted ‘bread’ for small sandwiches.
PB&J Pancake ‘Sammies’ Defrost mini pancakes in the microwave. Spread half the pancakes with a layer of peanut butter (or favorite nut butter) and the other half with a layer of grape jelly (or another fruit jelly). Put the halves together and pack in resealable plastic bags.
WHOLE-WHEAT WRAPS
These handheld treats travel well and are filling and finger-friendly.
Cream Cheese and Jelly Pinwheels Spread a wrap with layers of cream cheese and your favorite jelly, roll up, and cut into one-inch pieces that look like pinwheels from the side. Pack inside an airtight container.
Spinach and Feta Quesadillas Melt some feta cheese and chopped spinach between two wraps in a pan heated with oil. Then cut into wedges. Store in an airtight container with a small cup of mild salsa for dipping.
STRING CHEESE
Fun to eat while keeping kids busy, a single serving provides 10 to 20 percent of the daily calcium recommended by the USDA.
Ham and Cheese Roll-Ups No bread is needed for this tasty alternative to a pig-in-a-blanket snack. Simply roll thinly sliced deli turkey or ham around a half or a full stick of string cheese. Securing with a toothpick would be dangerous for little ones; instead, store the roll-ups seam side down in an airtight container to keep fresh.
Cheesy Pizza Rolls Cut up a whole stick into little pieces and arrange them on a whole-wheat wrap. Cover the cheese with two tablespoons of marinara sauce. Roll up the wrap and microwave for 30 seconds until the cheese is slightly melted. For short trips, keep warm in a piece of aluminum foil or store in an airtight container.
FRESH FRUIT
Sweet fruit makes for a refreshing and healthy snack that’s full of fiber and vitamins.
Mini Fruit-and-Cheese Plate Peel and dice fruit (like apples and pears) into ½-inch chunks and serve along with cubes of your child’s favorite cheese and wedges of whole-wheat pita. Everything can be stored easily in airtight containers.
Frozen Banana Bonbons Cut banana into 1-inch rounds, dip in a favorite flavor of yogurt, and roll in crushed graham crackers. Place the slices in an airtight container and store it in the freezer until you’re ready to travel. These bonbons are best served on car trips because they defrost pretty quickly.
Minty Sweet Salad Cut watermelon, cantaloupe, and honeydew into 1-inch cubes (you should have 2 cups total). In a small bowl, whisk together the juice of 1 lime, 2 tablespoons honey, and ¼ cup finely chopped mint. Toss ½ cup of grapes into the melon mixture, pour over the dressing, and toss. Pack in an airtight container and put in the fridge to maintain freshness.
APPLESAUCE CUPS
Mashed, cooked apples give kids a serving of fruit while satisfying a craving for something sweet.
Apple Dip Pack individual snack cups alongside resealable bags filled with carrot sticks or baby carrots and celery sticks for easy dipping. Or, instead of cups, portion out applesauce into airtight containers.
Apple “Pie” Cups Crush pieces of graham crackers over a cup of applesauce to create a tasty and super healthy mock apple pie. For maximum crunch, store the crackers in an airtight container and then crumble pieces into a cup of applesauce before eating; otherwise, the crackers will get soggy.
FROZEN EDAMAME
Veggies aren’t always an easy sell, but edamame is a smart on-the-go munchie that’s packed with iron, omega-3 fatty acids, and protein.
Edamame Poppers Steam up a batch of frozen edamame in pods and store in an airtight container in the fridge for up to three days. Before you hit the road, sprinkle them with a touch of salt and watch the kids have a blast popping them from the shells right into their mouths.
Edamame Hummus In a food processor, puree 1 cup of frozen edamame (steamed and shelled) with 1 small clove of garlic, 2 tablespoons of olive oil, ¼ teaspoon salt, and juice of ½ lemon. Process until smooth and serve with cut veggies or pita chips. Store everything in an airtight container. Edamame hummus is full of fiber and a terrific alternative to high calorie packaged dips.
HUMMUS
Loaded with vitamin B6, folate, and iron, creamy hummus is no ordinary dip. Plus, its thick consistency means less chance of messy spills.
Super Dip Pack hummus inside a small airtight container along with some pita chips, baby carrots, red pepper slices, and celery sticks for dipping.
Pita Pocket Stuff small whole-wheat pitas with hummus and thinly sliced cucumbers (or another sliced vegetable) for a pocket sandwich packed with protein and fiber. Store in an airtight container or resealable plastic bag to keep fresh.
Tomorrow’s Child / November 2014 / p 37
Pychological Evaluations: What does it all mean?
To continue reading, you will need to choose a subscription plan.

Why Telling Your Children that They’re Smart Isn’t Smart
To continue reading, you will need to choose a subscription plan.
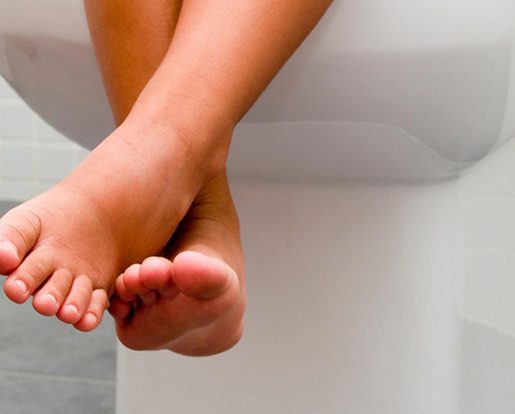
Toileting The Montessori Way
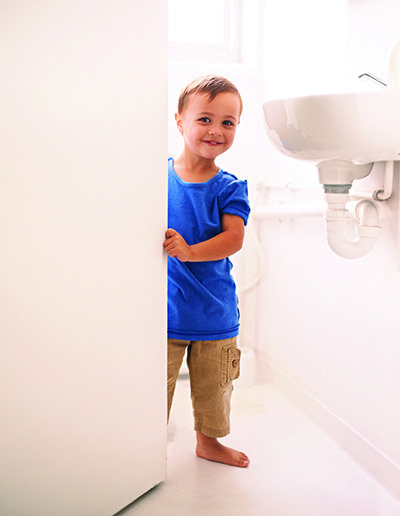 Editor’s Note: Several years ago, a Montessori parent wrote to us with concerns about the right way to help toddlers learn to use the toilet. She was quite frustrated and so was her child. We turned to our dear friend and toddler expert Susan Tracy, and we are reprinting this article after I went searching for it to help with my two toddler grandchildren. —Joyce St. Giermaine, Editor
Toileting is accomplished most easily with preparation that begins far in advance of the time when the child is ready.
I believe that most Montessorians who work with very young children would recommend that parents put their infants in cloth diapers from birth on. In addition to the obvious environmental reasons, natural cotton fiber is kindest to the baby’s tender skin. Also, in preparation for later toileting, children can easily sense that they are wet and discover the cause and effect of their urination and the resulting feeling of wetness. This is the first step in helping infants prepare themselves for toileting when they are developmentally ready.
Around the age of twelve months, children often become quite interested in the bathroom. They want to explore, play with the water in the toilet and may persistently follow their parents when they go into the bathroom. These are early signs of the child’s first interest in toileting.
By the age of fifteen months, children often show interest in wearing underpants. Many become fascinated with the process of dressing and undressing and may undress when it would be least expected. It is not uncommon for children of this age to try on their older siblings’ or parents’ underpants. What may seem to be simply cute or attention-getting behavior is probably just another indication that they are becoming curious about toileting.
Between thirteen and fifteen months, many children will want to sit on the toilet or potty chair in imitation of their parents’ and siblings’ use of the toilet, even though they may not yet have learned to control their bladder or bowel. At this point, parents can easily begin to introduce young children to the entire toileting routine: pulling down their pants; sitting on the toilet correctly; wiping their bottoms; pulling their pants up; flushing; and washing their hands. Most children will easily master this routine, just as they learn so many practical life skills in the Montessori classroom.
Their toddlers’ fascination with the toilet leads some parents to put a latch on the bathroom door or secure the toilet lid for fear that their youngsters will play in the toilet, potentially falling in and drowning. This gives the child the message that the bathroom and toilet are forbidden territory. They may simply be attracted to the toilet as a source of water play. It would be better to give them access to water in some other way, such as a preschool water table, a shallow basin, or from a low sink.
Allow children to experiment with flushing the toilet and when you sense that they are curious, explain body functions to them. Respond to their questions with clear, honest answers appropriate to their level of understanding. “Everybody poops. It’s normal. It’s our body’s way of getting rid of that part of our food that it doesn’t need.”
Myelinization is a process in infancy through which the nerves become coated with a fatty substance, myelin, which facilitates transmission of nerve impulses from cell to cell. As the nervous system becomes refined, the growing toddler begins to gain better and better coordination of their movements. This process works from the head down. The developing infant gains control of their head, then arms and the trunk of their body, and eventually their legs and feet. From random movements of the head, arms, and feet, the baby gradually gains the ability to move with conscious intent and control.
This process of Myelinization, or integration of the nervous system, which proceeds on an external level from the head down, is also taking place with the infant’s body. As the nerve cells become Myelinated, just as they gain control of the other voluntary muscles of the body, Myelinization allows control of the sphincter muscles that control the bladder and bowel. Theoretically, these muscles have become Myelinated before the muscles of the legs according to this head down progression. This is confirmed by our observation of young children.
Around eighteen months, children enter a sensitive period in which they can most easily gain control of their now much more developed and integrated nervous system. At this stage, most children have both the physical ability and the interest to control bladder and bowel. If they are given the opportunity to spend as much time as possible in underpants, rather than diapers, they gain a greater awareness of these bodily functions. The absorbency of disposable diapers prevents toddlers from sensing when they have urinated.
During this sensitive period, if the child is in underpants most, if not all, of the time, he will quickly learn to sense when his bladder is full and he needs to go to the bathroom. And there we have it. The child has developed the neuromuscular ability to control his body, his interest in using the potty chair or toilet is activated, and he is well under way in mastering the specific steps involved in using the toilet.
Parents should be comfortable and prepared for this process. They need to be calm when the child has an accident. They need to be very patient and reassuring when a child has an accident. Perhaps they can have some old towels available that they and the child can use to wipe up an accident. Underpants should be stored on a low shelf, in a cubby, or in an easily accessible drawer so the child can get them for herself as needed. A hamper should be provided for wet underpants and towels used for clean up.
Most children who are put into underpants at this age can be using the toilet consistently within a few weeks or months. They learn this out of their desire to be independent. It is a self-motivated process. The parent can be encouraging and can prepare the environment to support the child when he is ready: using the cotton training pants; allowing access to the bathroom; providing an appropriate way for the child to explore both the use of the toilet and to play with water; their patient explanation of body functions; the provision of old towels for cleaning up accidents; and their gentle understanding when accidents do occur.
Toileting is not something facilitated through the parent’s efforts; thus, we avoid the term “toilet training.” It is, or rather should be, a natural process that grows out of the child’s interest, desire for independence and self-respect, and gradually evolving neurological development. “I did it myself!” Toileting is the child’s work, not his mom or dad’s. They play a secondary and supportive role. Rewards and punishment are both unnecessary and inappropriate!
This sensitive period, in my observation, ends at about 24 months. As the child gets older, toileting becomes more difficult, and becomes more of an issue between child and parent. It is best to give the child more independence, provide underpants and, ideally, eliminate diapers. The child can then gain this skill and independence for himself.
Tomorrow’s Child November 2016 / p 28
Featured
-
 Montessori Family Alliance School Group Membership (Print & Digital 2026 1/2 year pricing)
Original price was: $30.00.$15.00Current price is: $15.00.
Montessori Family Alliance School Group Membership (Print & Digital 2026 1/2 year pricing)
Original price was: $30.00.$15.00Current price is: $15.00.
-
The Montessori Way, Revised and Expanded: An Education for Life; A Comprehensive Guide for Parents and Teachers
$25.00
-
The Montessori Child: A Parent's Guide to Raising Capable Children with Creative Minds and Compassionate Hearts (The Parents' Guide to Montessori)
$20.00
-
The Montessori Toddler: A Parent's Guide to Raising a Curious and Responsible Human Being (The Parents' Guide to Montessori)
$20.00
-
Montessori in Action: Building Resilient Montessori Schools 1st Edition
$29.95