To access this page, you will need to log in or become a member.
Strategies for Montessori Home Learning

Strategies for Montessori Home Learning

The world in the palm of her hand tim seldin

Review:

The World in the Palm of Her Hand
By Tim Seldin
click to purchase

For parents who want some actual scripting on working with their children at home, we recommend this book. I used it on many occasions with my four granddaughters and they enjoyed the activities immensely. You do not need to be in a classroom to have these kinds of conversations about the world in which they live. The book actually contains the introductory lessons for young learners in the areas of Geography and History but our intent is show you that it is possible to have great conversations with your Montessori child in a Montessori way (incidentally, that is the name of another amazing book!).

The carefully constructed lessons your child’s guide delivers is done in what they call the Three-Part Lesson format.

The carefully constructed lessons your child’s guide delivers is done in what they call the Three-Part Lesson format. I’m going to share from the book so you can see how you can do this as well. And again, we don’t expect you to become a Montessori guide nor have the specific materials in your home; our purpose is to help you understand some ways you can engage your children and just follow the format, so that the message is delivered in a verbal way that children are used to hearing from their guide.

LESSON: COLOR IDENTIFICATION:
For the youngest children, who are just learning to master their ability to identify colors.
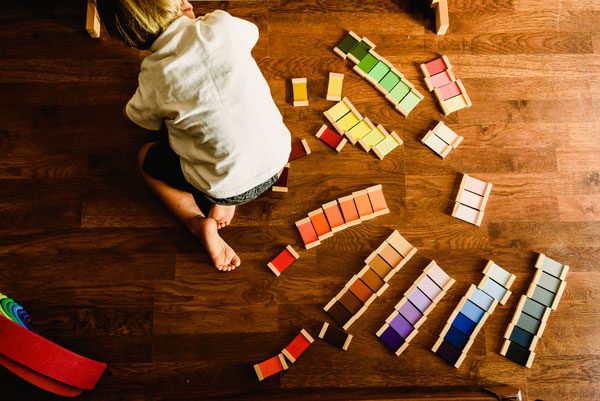
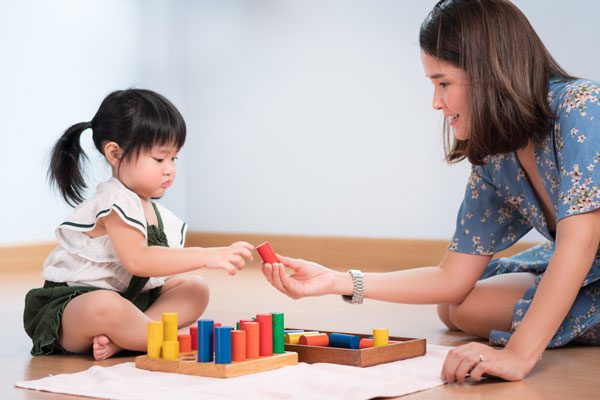
color tiles montessori at homeTo illustrate how you could do this at home, you could use a variety of ways to demonstrate colors if you don’t have a set of color tiles: index cards (or color swatches for paint that you can get from hardware stores) already made up with first the primary colors of red, yellow and blue. When your children have mastered the primary colors, you can move on to secondary colors: green, purple and orange. You can always use real objects you have in the house, such as fruits and veggies of different colors. Keep it simple and keep it to just a few colors.

Have all your materials set up before you ‘invite’ the child to the work. You might say, “Would you like to do some work with colors right now?” Starting your sentence with “would you” makes it clearer that this isn’t some kind of test with consequences.

First Period
Name the color, “This is red.” Show the child the object.
“This is blue.” Show the child the object.
“This is yellow.” Show the child the object.
Remember to sound really enthusiastic.

Second period
This will help the child link the language and her own experience.
Say, “Would you show me the red (object)?”
“Would you show me the yellow?”
“Would you show me the blue?”
The second period actually does involve some deep learning, so you may need to go back to saying it the first way a few times. Try to sound positive as you restate the names of the colors while showing them each respectively.

Third period
Now you get to ask the child, while pointing to one of the objects, “Which one is red?” and so forth. If the child is unable to make the connection you may need to start at the beginning.

This is just a simple example, but might be useful in understanding that each child learns these skills at their own pace. Should you have an older child, you can use this delivery for more building vocabulary. Call objects by their correct names. For instance, if you are working on naming animals, call a cat a cat and not a kitty; a dog is a dog, and not a doggie. If the child is even older and you have, for instance, a German Shepherd, refer to the breed.

In the Montessori class, lessons are initiated in three ways:

  1. The teacher senses children’s readiness and invites them to join her/him for a lesson.
  2. Children become interested spontaneously and ask for a lesson.
  3. The teacher notices when children choose materials for which they have not yet been given a lesson and comes over to present the lesson.

Presenting the Fundamental Lesson: The fundamental lesson is the basic presentation given by Montessori teachers to introduce children to a new material or activity. If it is to have the enticing quality previously described, teachers must prepare themselves carefully.

  1. Teachers must be sure that they are completely familiar with the material and its correct use in order to prevent confusing children with their own uncertainty.
  2. The lesson must be simple and concise enough that the children will be certain to understand.
  3.  The fundamental lesson usually includes only a few words of explanation followed by a demonstration of the typical cycle of work with this material.
  4. To avoid unnecessary distraction, spoken language is limited when presenting the lesson to younger children; nonverbal communication seems to lead to less confusion.
  5. Be sure that all the pieces are present for the lesson/material you are presenting. Nothing is more disruptive to the child’s interest and concentration than discovering that something is missing.
  6. Prepare your work area in advance, allowing for enough space.
  7. Remember the aims of the lesson.
  8. Make your presentation quietly dramatic, emphasizing the key points referred to in the lessons under the heading Points of Emphasis.
  9. When your lesson is finished, either put the materials away with the children’s help, or withdraw to let them work on their own, making sure that they return all the materials when they are done.

The Role We Play to End Systemic and Internal Racism  What Questions Should We Ask Ourselves?

The Role We Play to End Systemic and Internal Racism What Questions Should We Ask Ourselves?

This was an initial conversation on issues of race and social justice with a panel that included Dr. Valaida Wise, Dr. Cindy Acker, Kristina Torres, Kathy Leitch, Jonathon Wolff and other, and a discussion about meaningful steps that Montessori educators and schools can and must take around the world to creating meaningful and enduring change. Click here to read our emailed statement on this issue. https://app.robly.com/archive?id=181e600a895e4488d7924fabc3e8abcd

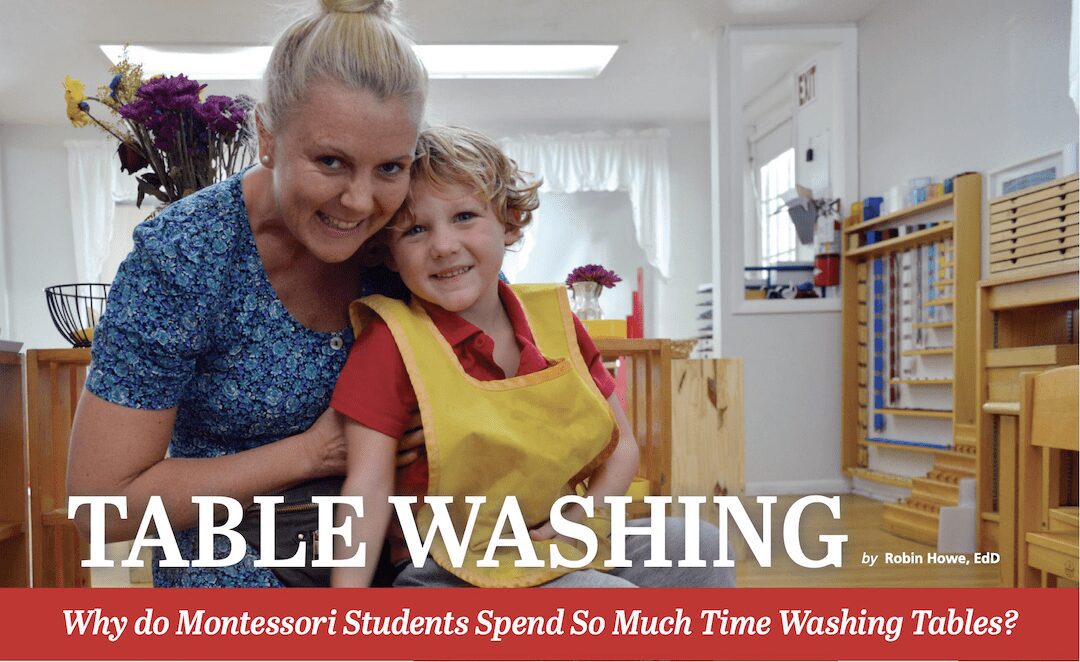
Table Washing: Why Do Montessori Students Spend So Much Time Washing Tables?

Table Washing: Why Do Montessori Students Spend So Much Time Washing Tables?

Table washing

by Robin Howe, EdD

Editor’s Note: If we had a dollar for every time a skeptical parent has questioned the amount of time their young Montessori child spends washing tables …

ANATOMY OF A LESSON

Ironically, I missed the session of my Montessori teacher training when we were given the lesson on how to wash tables. I remember doing it as a Montessori child. How hard could it be? I was just getting out of my first career in the restaurant business, and someone was going to teach me how to wash a table? I had washed and set tables for the rich and famous. I had cleaned more tables than everyone in that class combined. I was, in fact, relieved to miss that day of instruction. The summer training session ended, with my teacher trainer reminding me that I still needed to have a lesson on table washing.

A month later, about three weeks into the school year, where I was doing my internship, my lead teacher, a wonderful, experienced Montessorian, invited me to join her while she gave a review lesson to one of the returning students on table washing. Great, I thought! This was my opportunity to receive the lesson, seemingly without missing a beat. About twenty minutes later, I found myself sitting there observing a four-year-old finish up his work, while I, the ‘non-lesson-needing ‘expert’ watched dumbfounded.

I once thought that table washing was one of the most remedial tasks that a Montessori student would ever have to learn. As a result of watching this lesson, and essentially being humbled by a four-year-old (also an experience that has since occurred on many occasions), I have come to realize how important and difficult this work is for children.

I have now learned how to give this lesson, and it never ceases to amaze me that it is so complicated. More amazing is the way that my students seem to pick it up so quickly and how I still, after many lessons, have to focus in order to perform it correctly. For these reasons, I would like to share the lesson, as well as some observations, on how children respond to this exercise. It is my hope that others will gain a better appreciation for the complexity of this lesson and will, as a result, appreciate its importance and contribution as a part of the Montessori curriculum.

When working with any water exercise, the first step is to have the child put on an apron. Students are already familiar with where aprons are kept in the classroom, as well as how to put one on. Next, the teacher asks the student to go together to where the table-washing kit is located on the shelf. The child is either shown or asked to identify the table-washing kit and is then asked to take it to the side of the table that will be washed, placing the kit on the floor next to the table. Included in the table-washing kit are the following: soap in the soap dish; a soap brush; a pitcher for gathering the water; a bucket for dirty water; a basin (or bowl); a sponge; a drying cloth; and a hand towel that will serve as a mat for the materials. Generally, the materials are kept in the basin that will be used for the water. With the hand towel in place on the floor, the materials are arranged along the top of the hand towel in this order: sponge, soap, brush, drying towel (from left to right), and the water pitcher. And basin along the bottom. Note: This lesson may vary depending on the classroom and teacher.

After all the materials are placed on the towel, water is brought to the table using the water pitcher. Children have to fetch the water, which exercises body control as they navigate through the classroom, returning carefully with a pitcher filled with water (about two-thirds full). Then, the water is poured from the pitcher to the basin. The pouring of water from a pitcher is an extension of work that the student has already mastered in earlier Practical Life lessons.

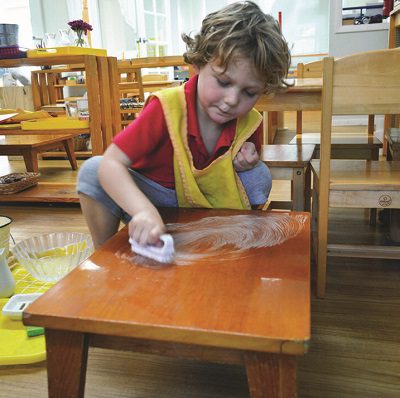
Next, the brush is wet and run across the soap until it is foamy. Using the wet, soapy brush, the table is methodically scrubbed in a circular motion. There should be small, but visible, suds on the surface of the table.

The brush is then rinsed and returned to its place on the mat. The dirty water is poured from the basin to the bucket, and the child carefully walks the dirty water to the sink to empty it. He will return it to the mat and fetch the pitcher so that he may again fill it with clean water to pour into the basin.

Now, the child wets the sponge and wrings out the excess water. Both the wetting of the sponge, as well as the squeezing of the sponge, are skills the child already possesses as a result of previous lessons in Practical Life. Starting at the bottom of the table, moving in horizontal motions, the child begins to rinse the soap from the table.

The sponge is wet once again. As an extension of this Practical Life exercise, the student might be asked to count how many compresses the sponge gets and then count the number of squeezes in order to expel excess water.

The child rinses the sponge, and picks up the towel to begin carefully drying the table top. After the surface is completely clear, the child checks the edge for suds and wipes it accordingly.

Step 1: Apron

Step 1: Apron

Step 2: Collecting Materials for the Lesson

Step 3: Preparing the Materials

Step 4: Getting Water

Step 5: Pouring Water

Step 6: Wet the Brush

Step 7: Soap the brush

Step 8: Scrub the Table

Step 9: Dump the Dirty Water

Step 10: Fill the Pitcher with More Clean Water

Step 11: Pour the Clean Water into the Bowl

Step 12: Wet and Wring the Sponge

Step 13: Wipe the Table with the Sponge

Step 14: Dry Table with Cloth

Step 15: Dump Dirty Water into Bucket

Step 16: Dump Dirty Water

Step 17: Clean Up Any Spills

Step 18: Roll Up a Clean Towel

Step 19: Fold the Mat

Step 20: Return the Materials to the Tray

At this point, the table is now clean and dry, and the basin is filled with soapy water. The student then pours the water in the basin into the bucket and disposes of the soapy water. The process of disposing of the water is also a very important part of the lesson. The child, again, has to navigate through the classroom, focusing on his movement and the balance of the bucket so as to not spill the water. This is great practice for walking slowly and being patient.

Once the water is dumped, the child uses the towel to make sure the work area is clean and dry. The dirty towel is placed in the laundry hamper, and a fresh towel is carefully rolled, and placed in the pitcher. Next, the mat is carefully folded and all materials are returned to the tray as they were found.

This lesson is important for many reasons. As mentioned during the lesson description, the child has to practice patience, while exercising fine-motor skills and balance. The student’s ability to sequence is challenged, as the proper completion of the work is dependent upon the ability to follow the proper steps. Another important aspect of this lesson, perhaps overlooked much of the time, is the time that the student spends working with the teacher. This is one of the longest lessons and can often take up to fifteen minutes.

During this process, children must listen carefully and ask questions, which helps them develop important language skills.

I hope that my description of this exercise offers some insight into the Montessori classroom and instills a sense of respect and feeling of awe for the children. Similar to the mistake I made, many people assume that these lessons with simple names must be simple, causing us to wonder how they could be so important. Indeed, I have come to realize that they are important, not only as a part of children’s Montessori academic curriculum but also their development as people. •

Daniel Robinson (Robin) Howe, III was a Montessori student from age two through the eighth grade. He worked his way through multiple levels of certification, spent many years in the classroom, managed a number of Montessori schools, and then earned his EdD. Formerly, co-head of the NewGate School, Robin is a senior consultant with the Montessori Foundation.

TOMORROW’S CHILD © • NOVEMBER 2019 • WWW.MONTESSORI.ORG

Dealing With Tantrums

Dealing With Tantrums

Tantrums

I’m going to dive right in to discuss a very tricky area for parents and children alike: tantrums.

I hope you find this article useful so you can start applying Montessori principles in your home too.

Dealing with Tantrums

Tantrums are a pretty normal part of life with children from around one to five years old. Maybe they’ll start a little later than one year and will end earlier, but anything in this range is fairly normal. Your child is learning that things don’t always go their way. And, as parents, we are helping them learn how to deal with these emotions and to make amends.

It can be upsetting for a parent. It’s hard to realize that your child is actually asking for your help. They are overwhelmed by the situation and need your support to calm down. It’s not the time to take it personally.

How to Avoid Tantrums

It can be possible to avoid tantrums before your child loses control. Here are some ideas to ward off tantrums when you see the first signs of your child losing control.

1. Be prepared: take a small bag with some simple games and some favorite snacks if you expect your child to wait patiently in a doctor’s office or a cafe.

2. Label their feelings: “Boy, you really wish you could stay longer”; “You really wanted some orange juice right now!”

3. Redirect them: “I can’t let you hit your brother, but you can hit this drum/pillow.”

4. Get down to their level: “You sound frustrated. Can you tell me why?”

5. If they are struggling, ask them if they would like some help: give them just as much help as they need and then step back.

6. Give them a choice: “Would you like to put on your shoes or your scarf first?”

7. Establish routines: “… and after lunch, we’ll go to the toilet, read a book, and tuck in for a rest.”

8. Let them show their anger creatively, “Show me how angry you are. Here is some paper and a pencil. Wow. They are big circles. You are really mad!”

Triggers

Events can often escalate to a full-blown tantrum. Sometimes it’s from your child’s frustration; other times their anger or rage; sometimes because they want to be in control; their communication may still be limited; or because they are tired, hungry, or overstimulated. They can throw themselves on the floor, push us away, try to hit us, a sibling, another child, or even break something.

It can be useful to note things that cause tantrums in your child: over-scheduling can be common; a new baby; moving to a new house; or certain children may trigger them.

Sometimes the tantrum is even caused by us as we deliver the news that it is time to leave the park, or we serve some food they don’t like for dinner, or that we would like them to get dressed to leave the house.

It’s OK for your child to have a tantrum. You can acknowledge their displeasure at what is going on. You can help them to do the thing that they don’t like. However, when we back down and give in to them, you will find they shout even louder next time.

It’s difficult to be the parent and stay strong. But your hard work will pay off in the long term. They will learn that when you say no, you mean no; and when you say yes, you mean it too.

I like the advice from Positive Discipline for Preschoolers (by Nelsen EdD, Jane, Erwin M.A., Cheryl, et al. Jul 9, 2019). “If you say it, mean it; and if you mean it, follow through with kind and firm action.”

Action may be, for example, leaving the park with a sad toddler, acknowledging that they really wish they could stay longer.

Alternatives to Time Out: How to Help Your Child Calm Down

When your child is having a tantrum, some experts advise putting them into time out. I find this difficult as your child is asking for help to calm down, and you are removing your support and punishing them instead.

When we punish our children, they often get angry at us rather than being sorry for what they have done. Or they try to work out a way to get away with it next time without being caught.

Instead, I look for ways that I can support my child to calm down. I’m not saying that their behavior is OK, but when they are in the middle of the tantrum, it is not the time to teach them anything. They cannot hear you. They have lost control. So let’s help them calm down.

Some children will respond to a cuddle during a tantrum. You can rub their back, cuddle them, and sing to them as they go through all the range of emotions from anger, to intense frustration, to sadness, and sometimes regret. I once held my son for 40 minutes as he refused to get dressed. And I watched him go through all these emotions. In the end, he announced he was ready to get dressed. He told me he loved me. He wasn’t angry with me. He was grateful that I had just been there for him. I know sometimes you have to leave, but in this case, we just changed our plans.

Other children will push you away and don’t want to be touched. In this case, I make sure they are safe and cannot hurt themselves or others. I stand nearby and keep offering my help, “I’m here if you need some help to calm down. Or we can have a cuddle when you are ready.” After the tantrum, I like to offer a cuddle. “That was tough. And now you have calmed yourself down. Would you like a hug?”

If they are throwing toys at their sibling or trying to hit me, I would remove them so that everyone is safe. “I can’t let you hit me. My safety is important to me. Would you like to hit these pillows instead?” If your child is trying to hurt the baby, you can place yourself physically between them to keep the baby safe as you help your older child calm down.

For a child over three years old, you can set up a “calm place,” which they can use when they are upset. It may be a tent with some pillows and favorite things. It may be a corner with some trains. You can ask your child if she would like to go to her calm place.

This is different than ‘time out,’ as the older child is in control; she can come out when she feels calm. If she comes back still in a rage, I would gently tell her that she looks like she still needs to calm down and can come back when she is ready.

Making Amends

Maybe you are thinking that if I support my children while they calm down, I’m saying that their behavior is OK, and I’m encouraging them to get angry. When they are upset, indeed, my objective is to help them calm down.

Once they are calm, I then help them to make amends. If they drew on the walls, I would get them to help me clean up. If they broke their brother’s toy, they can help to fix it. I’ve asked the kids to help scrub their sheets when they used marker pens in bed and made a mess.

In this way, they learn to take responsibility when things go wrong. And when it’s over, it’s over. The good thing about young children is that they can move quickly from deep anger and sadness back to their happy selves. We need to move on too and not let this upset the whole day by referring back to it or keeping on about it. Once they have made amends, it’s OK for everyone to move on. •

TANTRUM FAQs

Shouldn’t we just ignore their tantrum?

I don’t like to ignore children when they are having a tantrum. They may not let me touch them, but I keep offering support and letting them know I am available when they need me. If you were super upset and your partner just left the room for you to get over it, you would likely find them unsupportive. We are showing our kids that, good or bad, we will be there for them.

What do I do if we are out in public when they have a tantrum?

There are basically two options:

First: Go home—if you find it difficult to have people watching you, it’s best to just leave. This may mean parking a full shopping cart and following the above ideas once you are home.

Second: Stay and support them—my preferred option is to hang in there and do what you would do even though you are out of the house. If you have more than one child with you, make sure they are safe. And then offer as much help as you can to help your child calm down. People watching will more likely think about what a lovely, patient parent you are, rather than what a horrible noise your child is making.

I find it difficult to stay calm myself. What can I do?

If your child has triggered you, it is indeed difficult to help them calm down.

• If your partner is available, it can be easiest to get them to step in instead.

• You may want to make sure the kids are safe and go to the bathroom to catch your breath.

• Find a mantra that you can repeat, “I breathe in calm, I breathe out anger.”

• Remember not to take it personally. Perhaps visualize putting on a bullet-proof suit that will resist everything (including words) that your child throws at you.

These tips should help you remain calm and give your child the support they need to regain control.

Learn from Simone Davies, an AMI Montessori teacher with15+ years’ experience working with 0-3-year olds, owner of Jacaranda TreeMontessori in Amsterdam since 2008, mother of two teenagers, and author of the book The Montessori Toddler. Visit her blog at themontessorinotebook.com

This article is from the November 2019 issue of Tomorrow’s Child magazine. Reprinted with the author’s permission.

Harvard University’s Top 10 Home Energy Saving Tips

Harvard University’s Top 10 Home Energy Saving Tips

The Sustainable Community Leaders Program provides a unique opportunity for residents living in Harvard University Housing to have a direct and meaningful impact on the University’s greenhouse gas reduction goal and sustainability efforts. You don’t have to go to Harvard to implement these ten simple ways to help our planet (and your budget).

1. Swap CFLs for LEDs

Swaps out all incandescent and CFL bulbs for LEDs in table, desk, and floor lamps. They are 90 percent more efficient, contain no harmful gases, and can last up to 20 years!

2. Change laundry settings

Wait until you have a full load and then do your laundry on cold wash (BRIGHT COLOR SETTING). It not only extends the lifespan and vibrancy of clothing, it also saves 90 percent of the energy that would have been used to heat the water.

3. Clear vents

Have you ever felt that the temperature in your house doesn’t match your thermostat? Take a look around. You may be blocking your air registers! It may help to move some furniture and large items so the air can circulate more freely. This action may improve your heating and air conditioning system efficiency by 25 percent.

4. Unplug devices

Do a routine check to make sure chargers, adapters, and small appliances are all unplugged before you leave your home. Phantom energy is the electricity that electronics pull from the outlet while plugged in, even when the device is off. It can waste as much as 10 percent of your home’s energy.

5. Adjust temperature settings

Adjust your thermostat for when you are away from home versus when you are at home. Keep the fan setting to LOW. This creates a space for optimal comfort, health, and productivity.

6. Turn it off

Turn off EVERYTHING before heading out the door: lights; bathroom vents; computer; coffee maker; TV.

7. Make it easy

Plug in all your electronic equipment into a central power strip and then just hit the switch!

8. Manage power settings

Make sure your computer isn’t wasting any unnecessary energy. Set your power management settings to Energy Saver Mode and get rid of the screen saver. This cuts energy consumption and prolongs the computer’s
battery life!

9. Use your blinds and shades

Use daylight wisely, by keeping drapes open during the day to let in the warm rays or closed to keep out the sun if you are in a hot climate.

10. Take the stairs

Take the stairs instead of the elevator. Good for your health and a good way to save some kilowatts!

Retrieved from:
https://green.harvard.edu/tools-resources/green-tip/top-10-home-energy-saving-tips

Tomorrow’s Child/ November 2017/ Pg 27